 |
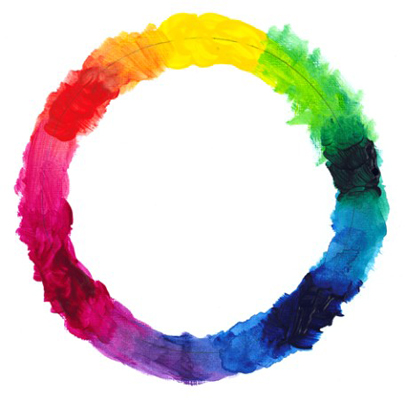
| Colour Wheel Image* |
Why do I say dreaded?? Well, every class I've ever taught always follows my statement of "let's make Colour Wheels!" with a typical "SIGH!!!". (I blame it on mostly teaching children and teens.) So lets start:
You can think of this post as an Activity but not... all at the same time!
I've started with the basic supplies: PAINT- red, blue and yellow, Brush, Something to paint on. I am using watercolours this time, watercolour paper and a mid sized brush. (Watercolours are the easiest to use because you can just add water to make them change.)
First we start with a structure. I like to draw my colour wheel out first, 3 circles, 3 squares and a triangle like so (Don't mind my crappy photo's today. My lights and Camera weren't cooperating):
 |
| Basic Form |
 |
| Primary's So Far! |
 |
| Our Colour Wheel! |
The neat thing with Secondary colours is that they compliment the Primary colours opposite them. This is why Christmas colours go so well (Red and Green)!
 |
| Yellow and Purple, Red and Green, Blue and Orange |
One thing to remember... you can always alter the shade of the mixed colour as well. If you add more blue to a purple it will be a cooler colour and more blue tinted... more red and it will look more burgundy (Tertiary Colours are Primary + Secondary, ex: Blue + Purple = Blue-Purple) . This is also something interesting to try if you never played with mixing colours before. I highly recommend using a scrap paper and trying out a bunch of different combinations to see what you get.
Now what do you notice if you mix ALL THE COLOURS TOGETHER? You get a yucky, mucky, browning colour... neat hunh?
If you need a colour darker add a little black (FYI: most black paint is blue tinted) and if you need it lighter (want to make pink) then just add some white (white + red = pink).
I found an AWESOME explanation of the Colour Wheel that you can buy in stores at this site: Curbly: Colour Wheel Romance. So if you want to further you knowledge check them out! :)
As for me I'm going to keep playing with my colours and next time we'll talk about WARM vs COOL colours.
Keep Creating
Angie :)
*Image from Acrylic Painting for Dummies by Collette Pitcher


No comments:
Post a Comment